OBS Studio Integration
The OBS Studio plugin provides integration with OBS Studio to allow controlling scenes directly from OpenLP.
Set up OBS Studio
To use the OBS Studio plugin, you first need to set up OBS Studio to allow remote control via the OBS WebSocket plugin. Follow these steps:
Download and install OBS Studio from the official website: https://obsproject.com/.
Download and install the Advanced Scene Switcher plugin from https://github.com.
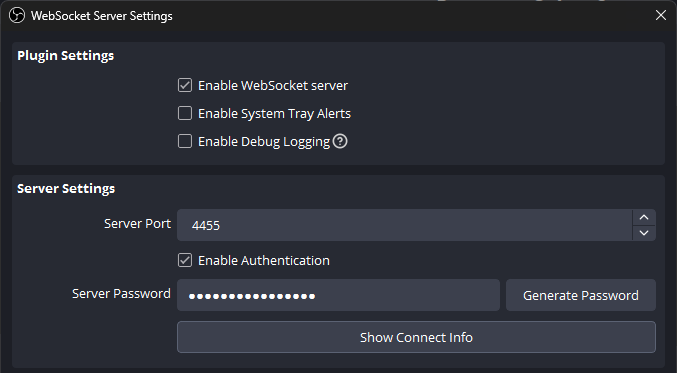
Open OBS Studio and go to Tools –> WebSocket Server Settings.
Enable the WebSocket server and set a password for authentication.
Take note of the port number (default is 4455) and the password you set by pressing “show connect info” and “copy” at the “server password” field.

Set up OBS Studio Plugin in OpenLP
To configure the OBS Studio plugin in OpenLP, follow these steps:
Open OpenLP and go to Settings –> Manage Plugins.
Ensure that the OBS Studio plugin is activated.
Go to Settings –> Configure OpenLP.
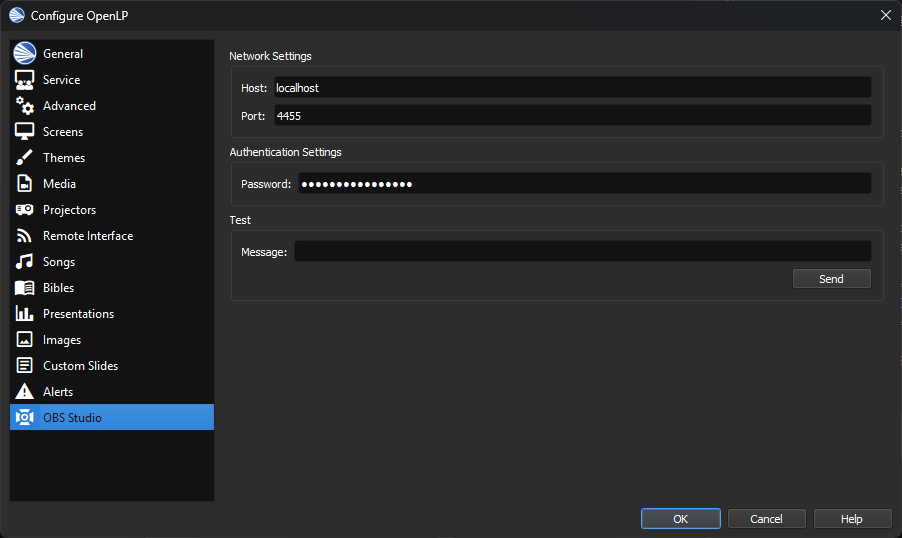
Go to the OBS Studio tab in the configuration window.
Enter the host name or IP address of the machine running OBS Studio (usually localhost if on the same machine).
Enter the port number of the WebSocket server of OBS Studio (usually 4455).
Enter the password you configured in OBS Studio.
Enter a test message and click Send to verify that OpenLP can connect to OBS Studio.
The message that is received from OpenLP has the following format: type: <slide type>, title: <slide title>, slide: <slide number>, notes: <slide notes>. For instance: “type: songs, title: Amazing Grace, slide: 2, notes: Verse 2”
Configure the Advanced Scene Switcher plugin in OBS Studio
Now you can configure events in the Advanced Scene Switcher plugin to change scenes based on actions in OpenLP.
Follow these steps:
Open OBS Studio and go to Tools –> Advanced Scene Switcher.
In the Advanced Scene Switcher window, go to the Macro tab.
Click Add to create a new macro.
Set the trigger to WebSocket Message Received.
Set the condition to match the message sent from OpenLP (e.g., “Intro presentation”).
Use the astrerisk (*) wildcard if you want to match any message containing a specific keyword.
Set the action to switch to the desired scene in OBS Studio.
Repeat steps 3-7 for each scene you want to control from OpenLP.

See https://github.com/WarmUpTill/SceneSwitcher/wiki for more information on configuring the Advanced Scene Switcher plugin.
Troubleshooting OBS Studio Integration
When you encounter a noticeable delay between changing slides on the live screen that is an indication that the WebSocket messages are not being received by OBS Studio.
You can see this in the log of OpenLP (openlp.log) where you will see repeated attempts to connect to OBS Studio.
For example: .. code-block:: text
2025-11-24 15:56:28,772 MainThread openlp.plugins.obs_studio.lib.message_listener ERROR Failed to make a connection to OBS Studio: [WinError 10061] Kan geen verbinding maken omdat de doelcomputer de verbinding actief heeft geweigerd
In that case make sure that the WebSocket server in OBS Studio is enabled and that the host, port, and password in OpenLP are correct.
When you would like to see what is sent from OpenLP to OBS Studio you should start OpenLP with the debug option.
In that case you will see log messages like this in openlp.log: .. code-block:: text
2025-11-24 15:57:48,634 MainThread openlp.plugins.obs_studio.lib.obs_studio_api INFO Sending Advanced Scene Switcher message to OBS Studio: type: songs, title: FIL-0033 How great thou art, slide: 1, notes: